Overview
What does a typical document signing process look like? Usually, the client receives a ready-made PDF document through various communication channels or third-party services. The client fills in all the necessary fields and signs the document, then returns the signed document to the sender.
Things can get more complicated when your documents don’t follow some distinct structure and contain many unique details per each individual client. For instance, rental agreements usually contain specific details of the rented property with some additional terms. In this case, we can use the DocuSeal HTML API to automate the process of creating and signing unique documents.
HTML is indeed a powerful and flexible tool for documents. It’s already familiar to almost every developer and provides a precise control on the appearance and structure of a document.
Now that we understand that HTML is the key to creating custom documents, it’s important to note that each individual custom document requires its own set of fields. Manually defining these fields would be a costly expenditure of time. To solve this problem we’ll use special HTML tags to draw fields on the document. DocuSeal allows you to define 12 field types using special HTML tags.
<text-field>
</text-field><signature-field>
</signature-field><date-field name="Date">
</date-field><image-field name="Photo">
</image-field><initials-field>
</initials-field><phone-field name="Phone">
</phone-field><stamp-field readonly="true">
</stamp-field><file-field name="Resume">
</file-field><checkbox-field>
</checkbox-field><radio-field
options="opt1,opt2">
</radio-field><select-field
options="opt1,opt2">
</select-field><multi-select-field
options="opt1,opt2">
</multi-select-field><payment-field
price="100" currency="USD">
</payment-field><verification-field
method="aes">
</verification-field>Each HTML tag can be finely tuned using attributes, and its size can be defined with css using the well known “style” HTML attribute.
Let’s take a look at the html attributes to configure the fields:
- Name - Field name. This attribute can be left empty if the field name is clear from the document’s content.
- Submitter - The signer’s role name. A document can have multiple signer roles, for instance, “Owner” and “Tenant”.
- Required - By default, when not specified, it’s set to “true”, meaning the field is mandatory. We can set it to “false” to make the field optional.
- Options - This attribute takes comma-separated values for “select”, “radio”, and “multi-select” field types. These values allow you to define the options to select.
By utilizing these attributes, we can finely configure each field, ensuring accuracy and flexibility in the document’s appearance.
Let’s get to work
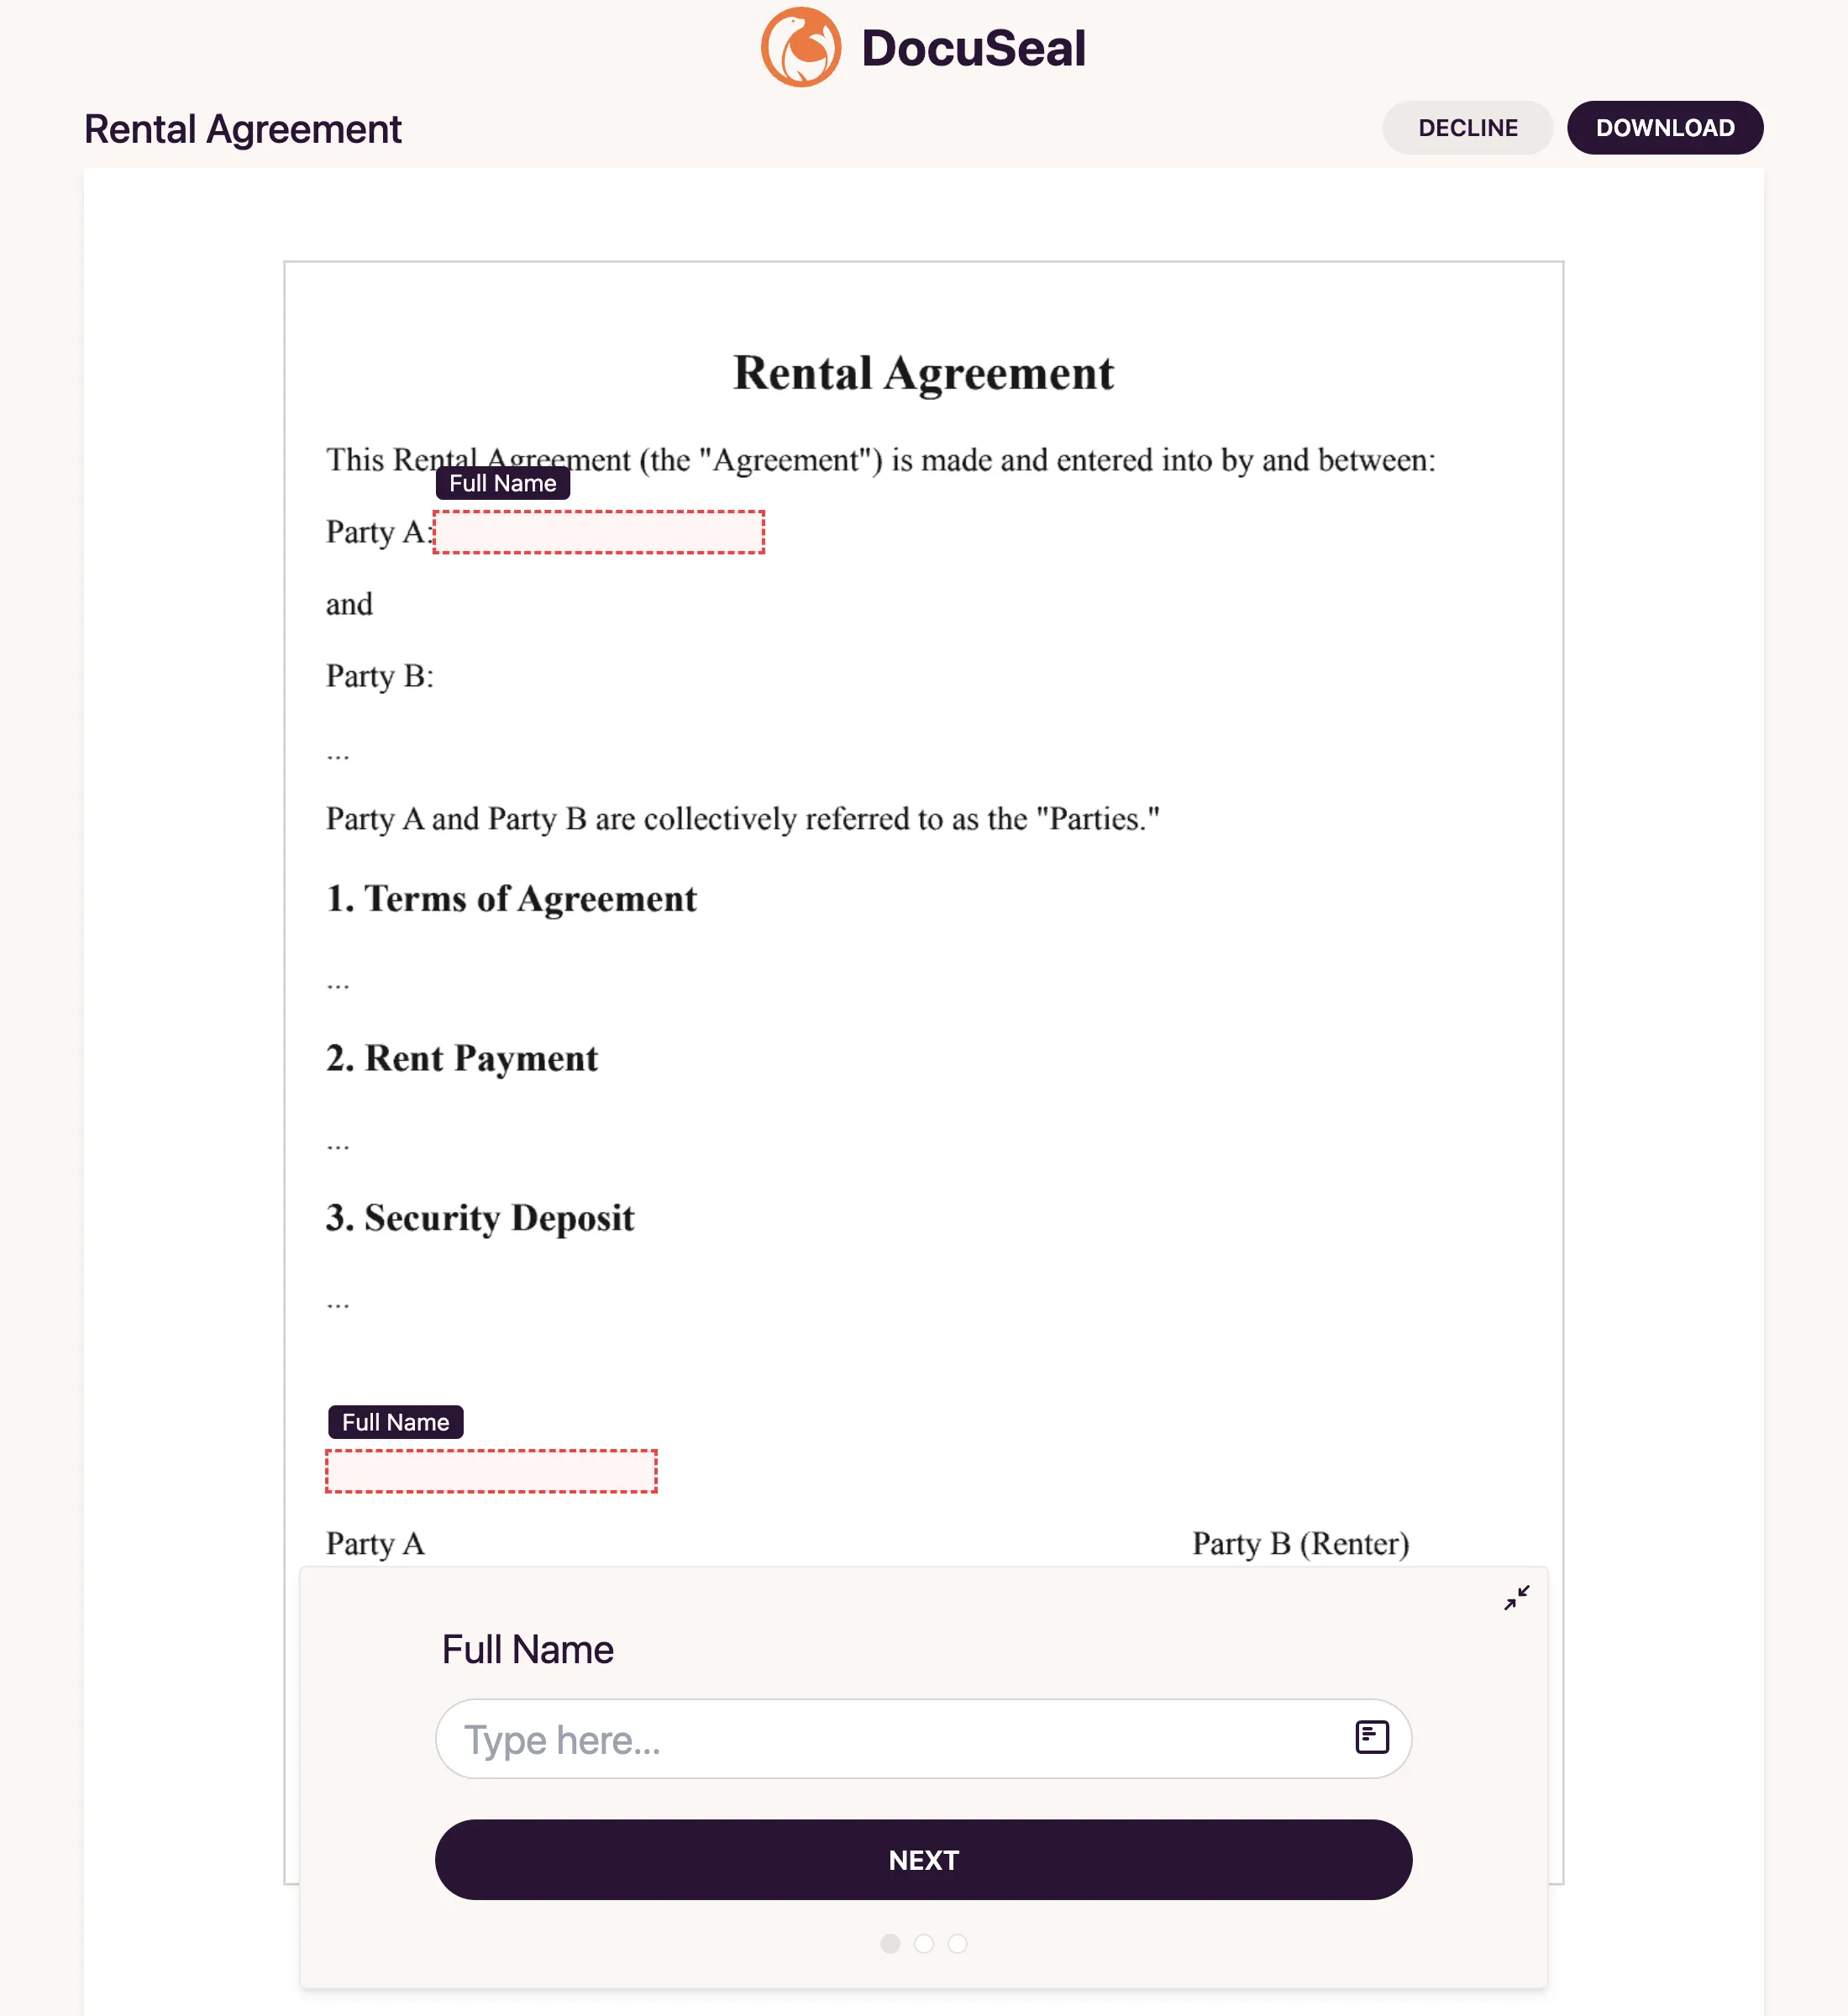
Let’s consider a situation where there’s a need to generate a lease agreement that must be signed by both the property owner and the tenant. This document should contain unique details from both parties. Here is an approximate outline for such a document:
<!DOCTYPE html>
<html>
  <head>
    <meta charset="UTF-8">
    <title>Rental Agreement</title>
  </head>
  <body>
    <div
      style="width: 80%; margin: 0 auto; padding: 20px; border: 1px solid #ccc;">
      <div style="text-align: center;  margin-bottom: 20px;">
        <h2>Rental Agreement</h2>
      </div>
      <p>This Rental Agreement (the "Agreement") is made and entered into by and
        between:</p>
      <p style="display: flex; align-items: center;">
        <span>Party A: </span>
        <text-field
          name="Full Name"
          role="Property Owner"
          style="width: 160px; height: 20px; display: inline-block;">
        </text-field>
      </p>
      <p>and</p>
      <p style="display: flex; align-items: center;">
        <span>Party B: </span>
        <text-field
          name="Full Name"
          role="Renter"
          style="width: 160px; height: 20px; display: inline-block;">
        </text-field>
      </p>
      <p>...</p>
      <p>Party A and Party B are collectively referred to as the "Parties."</p>
      <h3>1. Terms of Agreement</h3>
      <p>...</p>
      <h3>2. Rent Payment</h3>
      <p>...</p>
      <h3>3. Security Deposit</h3>
      <p>...</p>
      <div
        style="display: flex; justify-content: space-between; margin-top: 50px;">
        <div style="text-align: left;">
          <p style="display: flex; align-items: center;">
            <text-field
              name="Full Name"
              role="Property Owner"
              style="width: 160px; height: 20px; display: inline-block;">
            </text-field>
          </p>
          <p>Party A</p>
          <p style="display: flex; align-items: center;">
            <span>Date: </span>
            <date-field
              name="Date"
              role="Property Owner"
              style="width: 100px; height: 20px; display: inline-block;">
            </date-field>
          </p>
          <signature-field
            name="Property Owner's Signature"
            role="Property Owner"
            style="width: 160px; height: 80px; display: inline-block;">
          </signature-field>
        </div>
        <div style="text-align: left;">
          <p style="display: flex; align-items: center;">
            <text-field
              name="Full Name"
              role="Renter"
              style="width: 160px; height: 20px; display: inline-block;">
            </text-field>
          </p>
          <p>Party B (Renter)</p>
          <p style="display: flex; align-items: center;">
            <span>Date: </span>
            <date-field
              name="Date"
              role="Renter"
              style="width: 100px; height: 20px; display: inline-block;">
            </date-field>
          </p>
          <signature-field
            name="Renter's Signature"
            role="Renter"
            style="width: 160px; height: 80px; display: inline-block;">
          </signature-field>
        </div>
      </div>
    </div>
  </body>
</html>const fetch = require('node-fetch');
const html = `<!DOCTYPE html>...`; // HTML content from the previous code snippet
fetch('https://api.docuseal.com/submissions/html', {
method: 'POST',
headers: {
'X-Auth-Token': 'YOUR_TOKEN',
'Content-Type': 'application/json',
},
body: JSON.stringify({
name: 'Rental Agreement',
documents: [
{
name: 'rental-agreement',
html: html,
size: 'A4'
}
],
submitters: [
{
role: 'Property Owner',
email: 'property.owner@gmail.com'
},
{
role: 'Renter',
email: 'renter@gmail.com'
}
]
}),
}).then((response) => {
if (!response.ok) {
throw new Error(`HTTP error! Status: ${response.status}`);
}
return response.json();
}).then((data) => {
console.log(data);
}).catch((error) => {
console.error('Error:', error);
});
Make sure you've replaced the X-Auth-Token and emails with real values:
After successfully executing this request, both parties receive emails with instructions, and the entire subsequent process is fully handled by DocuSeal.
That's how we've just created a PDF with fillable fields and fine-tuned the placement, appearance, and format of the fields. This approach not only saves time but also makes the process of creating and signing unique documents more convenient and efficient.